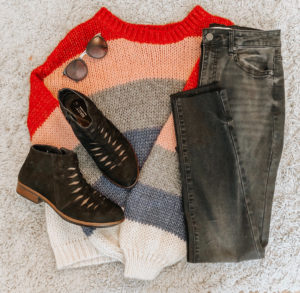
One thing that has always caught my eye while scrolling through social media are flat lay photos. If you’re not familiar, flat lays are basically photos that are shot directly above the objects you’re photographing. These photos are aesthetically pleasing and allow you to get super creative. Flat lays can be used to tell a story because they incorporate props, colors and different objects that really help make a photo come to life. Whether you’re photographing food, beauty products, or clothing there’s never a bad time to try shooting a flat lay for your social pages.
Check out these tips and tricks if you’re trying to create a flat lay that will really ‘wow’ your followers.
1. Keep the Background Simple
One of the first steps to follow when creating a flat lay involves finding the right background for your photo. For a majority of flat lays, the best backgrounds are usually white. Keep in mind that you’re trying to make the objects and products you’re photographing stand out. An overwhelming background will take away from this. Some other backgrounds that tend to work well for flat lays are marble, hardwood floors, solid bright colors, etc. Play around with different backgrounds and see which one really makes your products stand out.

2. Use Props
The most important part of flat lay photography includes the different items and props you place in the photo. You want to do your best to make the product you’re promoting the main focus of the shot, but try spicing it up a bit by adding other relevant items. For example, if you’re shooting a pair of shoes, why not show how the shoes can be styled? This helps the consumer visualize the product in a different way.

Key takeaway: Play around with props and incorporate things that would help you better understand the product and how it can be used, worn, eaten, etc. (whatever it may be).
3. Make it POP
If you really want to make your photo “pop” you’re going to want to experiment with different sized props, textures, and colors. Adding texture to a photo really helps bring it to life and is going to make it aesthetically pleasing. When taking your photo, don’t be afraid to move things around and style it different ways. Place big items next to small ones, add texture by incorporating plants, rugs, etc. and always throw in a pop of color or two. It’s important to remember that not every prop has to fully be in the photo. It’s okay to cut things out and angle your props in different ways!

4. Get Inspired
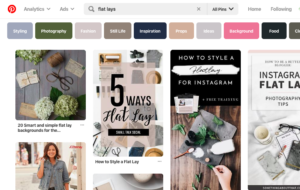
Pinterest is a great site to utilize if you’re looking for a little inspiration when creating your first flat lay photo. It’s never a bad idea to check out other photos before taking your own. Take notes on how they’ve set up the shot and what props they’ve included to make the photo come to life. This will definitely inspire you and hopefully help you spark your own idea, too
.
Let us know in the comments what tips and tricks you keep in mind when creating flat lay photos!


