
Instant gratification: the desire to experience pleasure or fulfillment without delay or deferment. Everyone loves getting what they want, when they want it. Is there anything better than eating a giant slice of pizza when you’re hungry? Can you imagine something more satisfying than falling into the comfiest, biggest bed when you’re sleepy AF? If you’re browsing Instagram and pause on an outfit that you simply MUST possess, is there any greater thrill than being able to tap that dope getup and be instantly taken to a shop page? If you say no to any of those questions, you’re probably lying 😉
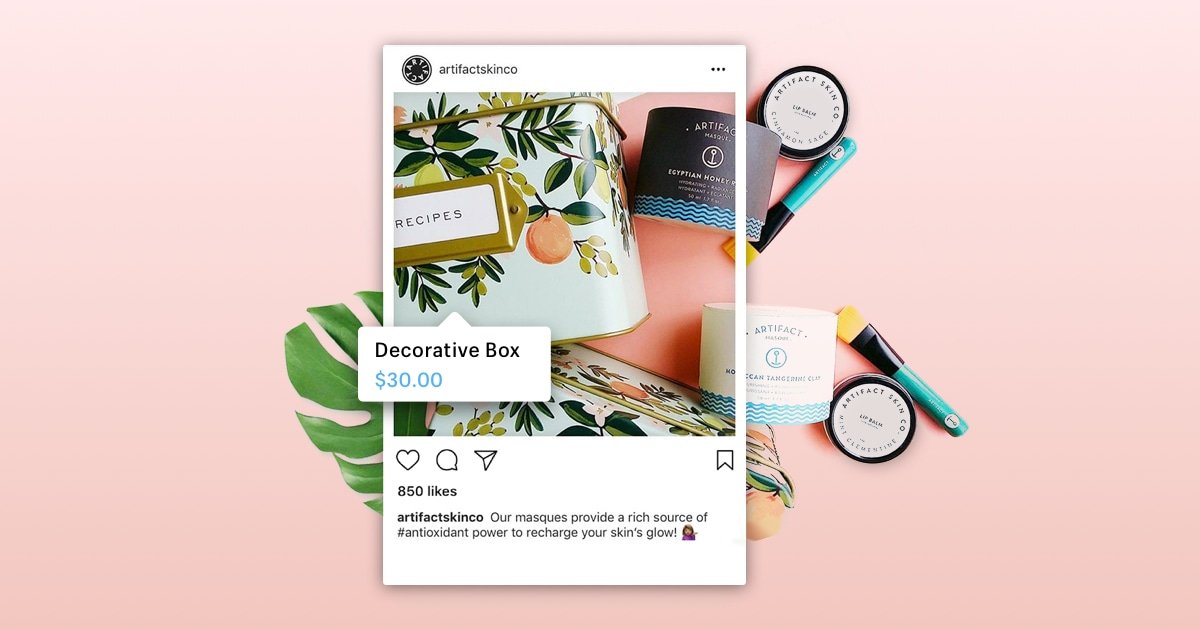
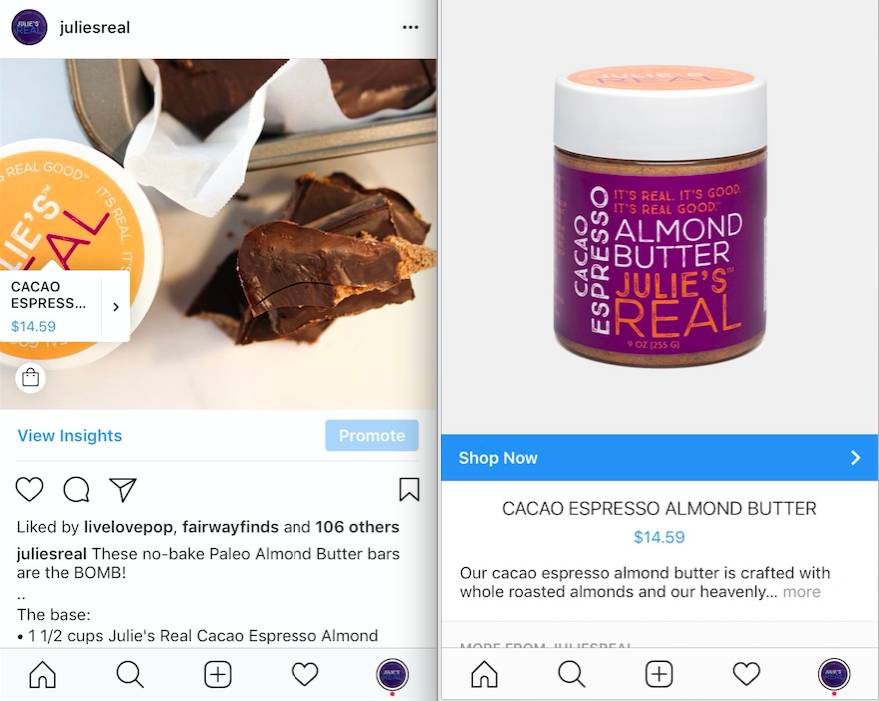
For brands on Instagram, the shoppable posts feature is one of the most useful updates released within the past year. It encourages customers to buy instantly and makes conversions more likely for anyone using the platform to increase sales.
So, how do you take advantage of this feature? Follow the Genies’ handy guide to setting up shop on IG.
1. Do you have a Shopify account?
As of now, shoppable posts are only available to retailers who sell on the popular sales platform Shopify. Shopify grants easy access to thousands of plug-ins and apps and simplifies the overall sales experience. Even the most inexpensive Shopify account level can be integrated with Instagram.
2. Ensure that your brand has switched over to business on Instagram
This change can be made by checking out the settings tab. You’ll also have to connect your business to a pre-existing Facebook business page, so be sure to have that password info on hand. Now, make sure that you’ve updated your Instagram app relatively recently.
3. Link Instagram to your Facebook Catalog
Have you created a product catalog on your Facebook page? If not, you should. Product catalogs drive sales without pushing followers to your website. They’re also necessary to make Instagram posts shoppable. Syncing your site inventory to Facebook is as easy as connecting the page to Shopify.
Once all these steps are followed and all accounts are correctly connected and syncing with each other, the rest is simple!
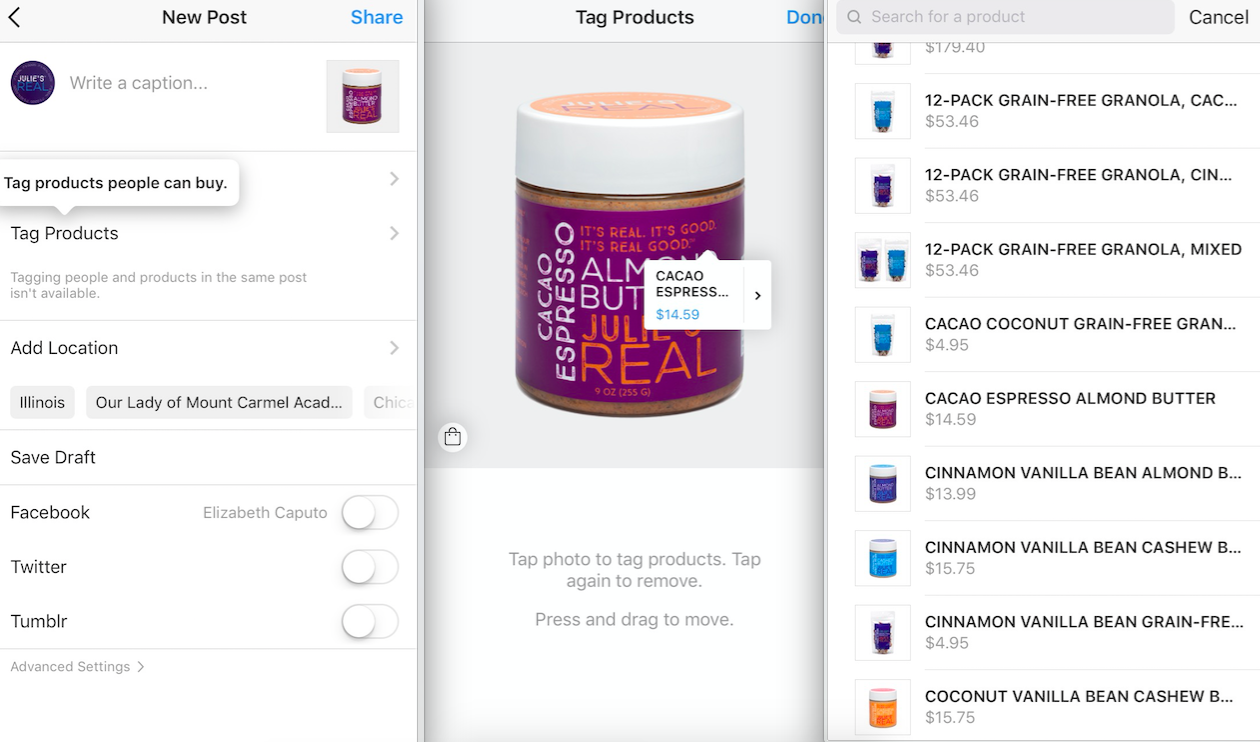
4. Upload an image
This can be a product image or a lifestyle shot. Once you’ve edited it in Instagram, you’ll hit the final page that asks you to add a caption, and tag either followers or products [note – at this time you cannot tag both a follower and a product in an image. You must choose one or the other.]
5. Tap “tag products”
And pick a place in the photo that you want the product name to pop up on. Logically, you’d probably want it to appear right on the product you’re tagging, but I can’t tell you what to do. Get down with your bad self and place the tag wherever makes you happy.
6. Choose the product
If your catalog is short enough, Instagram will give you a full list of the products in your store for you to choose from. You’ll likely have to use the search feature for accounts that have product catalogs of several hundred SKUs or more. Find your product, save the tag, and complete your upload as normal.
You’ve done it! Now users can stop, tap, and shop, all without having to search your products on the site (increasing conversion rates). They can instantly grab what they want from your store, without hassle!
Last tips: if applicable, always make sure your post has a proper location tag, and use hashtags to make your items more discoverable!